Monday 22 July 2019

Running .yml file in Docker to build WordPress application along with MySQL DB

WordPress is sample application made available as image in Docker hub/repository. To build this application with docker process it is also required DB to associate.

Following is the sample yml file with configuration details to be used in docker to build wordpress application up and running.

docker-compose.yml application:

version: '3'
services:
  wordpress:
    image: wordpress:latest # https://hub.docker.com/_/wordpress/
    ports:
      - 8081:80
    environment:
      WORDPRESS_DB_HOST: db
      WORDPRESS_DB_NAME: govardhansql
      WORDPRESS_DB_USER: root
      WORDPRESS_DB_PASSWORD: abc123
    depends_on:
      - db
    links:
      - db

  db:
    image: mysql:latest # https://hub.docker.com/_/mysql/ - or mariadb https://hub.docker.com/_/mariadb

    command: [
        '--default_authentication_plugin=mysql_native_password',
        '--character-set-server=utf8mb4',
        '--collation-server=utf8mb4_unicode_ci'
    ]
    environment:
      MYSQL_DATABASE: govardhansql
      MYSQL_ROOT_PASSWORD: abc123


This file is located in my local machine with the path: "C:\Govardhan\YYYY\DevOps\Docker\wordpress"execute this .yml file from docker with following commands.
first open the cmd prompt or windows powershell.

CD C:\Govardhan\YYYY\DevOps\Docker\wordpress
docker-compose up

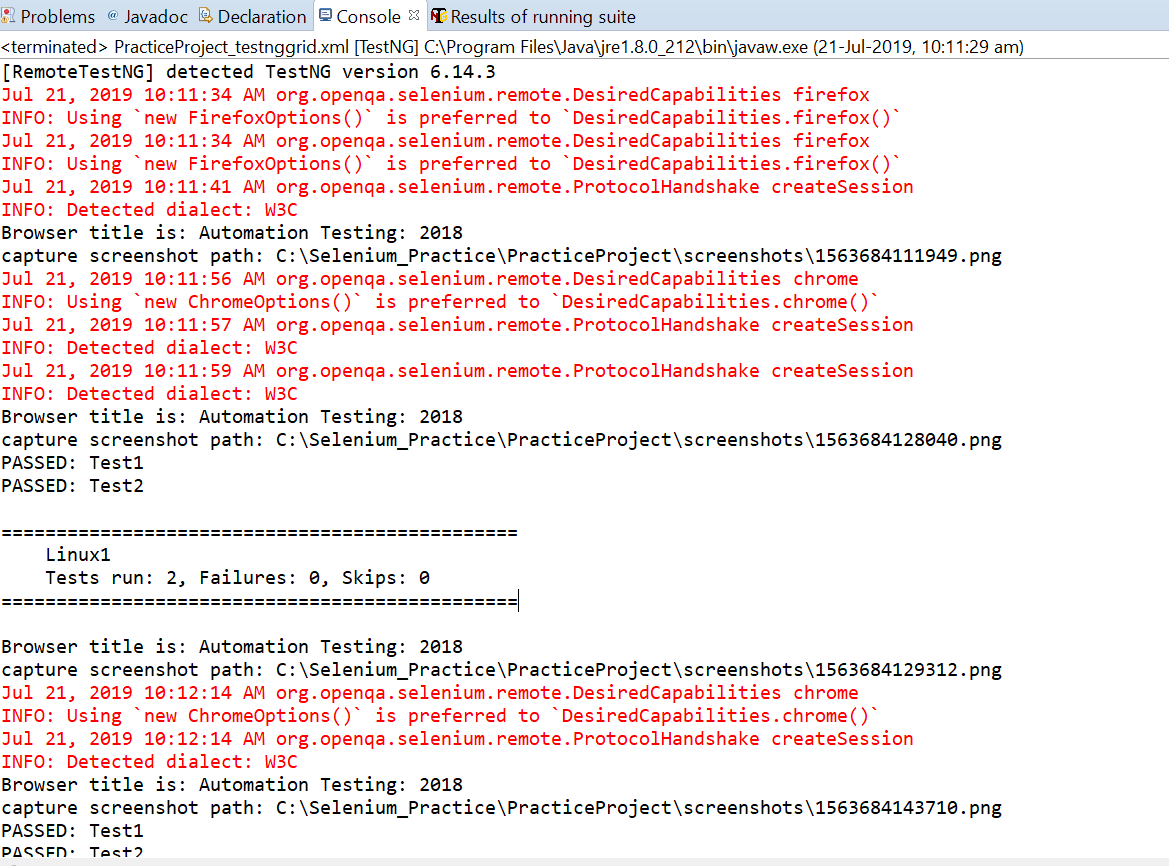
following are screenshots for the reference.


later use the url as "http:\\localhost:8081" to view the wordpress application.

Hurry!!!! We have build the wordpress application in the docker container in very quickly with the power of Docker.

Docker useful commands with respect to DevOps, Jenkins and Selenium

Having docker commands handy is always good to speed up your work. Following are few useful commands from docker.

Pre-Requisite: installing the docker. To install docker please refer docker installation

Docker handy commands:
'shows all the containers and images irrespective of their running status
docker ps -a

'shows all the containers and images which are currently running status
docker ps

'to pull any image from the docker hub. this command only pull the image to host docker
docker pull <image name>
Ex: docker pull mysql
docker pull jenkins
docker pull selenium/hub

'to run any of the image. some images required to pass some parameters but some images can run directly with simple command.
docker run mysql
docker run --name govardhan-wordpress --link govardhansql:mysql -p 8080:80 -d wordpress
'URL deployed from wordpress can be accessed with: http://localhost:8080/

docker run --name GovardhanJenkins -p 8083:8080 -p 50000:50000 -v /var/jenkins_home jenkins
'URL deployed from Jenkins can be accessed with: http://localhost:8083/

mysql image installation commands:
docker pull mysql  -- pull the image from the repository
docker run --name govardhansql -e MYSQL_ROOT_PASSWORD=abc123 -d mysql:latest

docker pull mysql  -- will pull from the repository
docker run mysql -- will run the image in the container

Running docker .yml file:
'running .yml file for with docker compose option. This option is quite easy compare to run the commands sequantially.
' copy the docker .yml file and run the below command from cmd problem or windows powershell after navigating to .yml file location/directory
'example: my docker file is located at C:\Govardhan\YYYYY\DevOps\Docker\wordpress
cd C:\Govardhan\YYYY\DevOps\Docker\wordpress
docker-compose up
' the above command automatically opens the .yml file and compose the docker to create container and run the image.

How to delete docker image:
'below command will delete images which are not associated to any containers
docker image prune -a

'Remove all images which aren’t associated with a running container: The -a parameter is the crucial bit here.
'If you want to force the action to occur without a confirmation prompt, you may add the -f parameter, like so:
docker image prune -af
Note: -af is the same as specifying -a and -f separately

Running Selenium Grid/Hub to execute Selenium scripts in parallel mode:
'to run the selenium grid in docker container, please run the following commands
'up selenium hub
docker run -d -p 4446:4444 --name GovardhanSelenium-hub -P selenium/hub
'to link with node chrome
docker run -d -P --link GovardhanSelenium-hub:hub selenium/node-chrome-debug
docker run -d -P --link GovardhanSelenium-hub:hub selenium/node-firefox-debug
' after this Selenium grid can be accessed with below URL
http://localhost:4446/grid/console

Inspect the docker image to find out the configuration details and other stuff:
docker inspect <image name/id>
example: docker inspect GovardhanJenkins

View the container generated log:
docker logs <image name/id>
docker logs GovardhanSelenium-hub
docker logs 93ebac97829d

Sunday 21 July 2019

Running multiple selenium scripts in parallel mode with Grid and Docker Linux containers

It is quite common to run selenium automated scripts from windows machine, but sometimes management request us to run the same scripts in Linux with different browsers.

In conventional way to fulfill above requirement, usually we move whole selenium scripts with framework in to linux machine and run the same script which is quite time consuming process and also we have to worry about infrastructure cost.

To achieve this, we have various options available. we could connect to saucelabs or browserstack tools and get this done. But these are licensed tools/interfaces

If you are just doing limited testing on linux browser then I would recommend to go docker Linux containers which is quite easy and super fast.

In this post I am going to explain how we can run selenium scripts with grid in parallel way by running those scripts in Docker containers. This can be done in 3 below mentioned steps.

1.Create selenium sample script to be executed in grid format
following is one of the sample script

package practiceTestingGroupID.PracticeProject;

import org.testng.annotations.Test;
import java.net.MalformedURLException;
import java.net.URL;
import org.openqa.selenium.By;
import org.openqa.selenium.Platform;
import org.openqa.selenium.WebDriver;
import org.openqa.selenium.remote.DesiredCapabilities;
import org.openqa.selenium.remote.RemoteWebDriver;
import org.testng.annotations.BeforeTest;
import org.testng.annotations.Parameters;

public class TestNG_Grid {


public static RemoteWebDriver driver;

  @BeforeTest
  @Parameters({"strPlatform", "strBrowserName", "strHubURL", "strAppURL"})
  public void beforeTest(String strPlatform, String strBrowserName, String strHubURL, String strAppURL) throws MalformedURLException {
  DesiredCapabilities cap = null;
if (strBrowserName.equalsIgnoreCase("firefox"))
  {
  cap = new DesiredCapabilities().firefox();
  }
  else if  (strBrowserName.equalsIgnoreCase("chrome"))
  {
cap = new DesiredCapabilities().chrome();
  }
cap.setBrowserName(strBrowserName);
cap.setPlatform(Platform.LINUX);
driver = new RemoteWebDriver(new URL(strHubURL), cap);
driver.get(strAppURL);
  }

  @Test
  public void Navigate2018Posts() throws InterruptedException {
Thread.sleep(2000);
driver.findElement(By.xpath("//a[contains(text(),'2018')]")).click();
Thread.sleep(2000);
System.out.println("Browser title is: "+ driver.getTitle());
String strPath = UtilityFuns.CaptureScreenShotMethod(driver);
System.out.println("capture screenshot path: "+strPath);
driver.quit();
  }


}

2. Create docker Linux containers by installing hub and selenium/node-firefox-debug, selenium/node-chrome-debug images and linking these nodes with hub.


Copy the  path of the hub and pass this in the testng.xml file


3. Created testng.xml file to allow selenium script execution in parallel way
following is the sample testng.xml file

<?xml version="1.0" encoding="UTF-8"?>
<!DOCTYPE suite SYSTEM "http://testng.org/testng-1.0.dtd">
<suite name="Suite" thread-count="4" parallel="tests">
<test verbose="2" name="Linux1">
  <parameter name="strPlatform" value = "LINUX" />
  <parameter name="strBrowserName" value = "chrome" />
  <parameter name="strHubURL" value = "http://localhost:4446/wd/hub" />
  <parameter name="strAppURL" value = "http://easy2autotest.blogspot.com" />
    <classes>
    <class name="practiceTestingGroupID.PracticeProject.SeleniumScriptOnGrid" />
    </classes>
</test> <!-- Test -->

<test verbose="2" name="Linux2">
  <parameter name="strPlatform" value = "LINUX" />
  <parameter name="strBrowserName" value = "firefox" />
  <parameter name="strHubURL" value = "http://localhost:4446/wd/hub" />
  <parameter name="strAppURL" value = "http://easy2autotest.blogspot.com" />
    <classes>
    <class name="practiceTestingGroupID.PracticeProject.SeleniumScriptOnGrid" />
    </classes>
</test> <!-- Test -->
</suite> <!-- Suite -->

When you execute this testng.xml file, it first connects to Selenium Grid which will connect to Docker container with the given path and with the help of RemoteWebDriver it triggers execution in browsers located in docker containers.

you can observe the execution in docker containers log or if you have VNS viewer you can connect to docker linux machine and see it.


Friday 19 July 2019

Docker windows storage location

Docker windows version can be installed in windows 10 enterprise edition.

After installing docker if you add add images in the container, the local(host) windows machine storage going to be increased as you are pulling all the images.

you can find the Hyper-V virtual hard disk size increased as soon as you pull any of the image available in the docker.

the virtual hard disk usually located in your local/host machine in below path.

C:\Users\Public\Documents\Hyper-V\Virtual hard disks


Tuesday 16 July 2019

Different Types of Exceptions in Selenium + Java

Exceptions in Selenium WebDriver
Exception general meaning is a condition that is not common. Exceptions in Selenium WebDriver occurs many times in different scenarios. Following are few of them listed with example.

1. NoSuchElementException:
This exception occurs when WebDriver is unable to identify the elements during run time. Due to wrong selector or selector, which is, not exist.

Example:-
driver.findElement(By.id("invalidid")).sendKeys("Testing");

2. ElementNotVisibleException:
This Exception occurs when the element presence is in DOM, it is not visible.

Example:-
Hidden Elements, which has presence in DOM and it, is not visible. Visibility means the height and
width should be greater than zero. Hidden Elements are defined in HTML using of type=”hidden”.
driver.findElement(By.id("hiddenid")).sendKeys("Testing");

Reason 1- Duplicated XPATH
While writing xpath for your application, you might have taken xpath that is matching with more than 1 element, in this case, Selenium will throw Element, not the visible exception.

Solution: Try to write unique XPATH  that matches with a single element only.

Reason 2:
If you are trying to access some particular element on Webpage that is not currently visible, in this case also you will get the Element, not visible exception.

Solution: Use Explicit wait feature of Selenium and wait till the element is not visible. Once it is visible then you can perform your operations.
Syntax for Explicit wait
new WebDriverWait(driver, 30).until(ExpectedConditions.visibilityOfElementLocated(By.xpath("//span[text()='index.html']")));

Reason 3 with solution:
This actually works for me a number of times. I was struggling with the OK button in my application. Even I was writing unique xpath but still I was facing Element Not Visible exception.  I have tried below code that solved my issue.

int ok_size=driver.findElements(By.xpath("//button[text()='OK']")).size();
driver.findElements(By.xpath("//button[text()='OK']")).get(ok_size-1).click();

3. NoSuchFrameException:
This Exception occurs when the driver is switching to an invalid frame, which is not available.
Example:-
driver.switchTo().frame(invalidindex);
(or)
driver.switchTo().frame("frame_z");

4. NoAlertPresentException:
This Exception occurs when the driver is switching to an invalid Alert, which is not available.
Example:-
driver.switchTo().alert().accept();
//Execute this command on browser without invoking the alert.

5. NoSuchWindowException:
This Exception occurs when the driver is switching to an invalid Window, which is not available.
Example:-
driver.switchTo().window("invalidwindowname");

6. WebDriverException:
This Exception occurs when the driver is performing the action after immediately closing the browser.
Example:-
driver.close();
driver.findElement(By.id("username")).sendKeys("Testing");

7. SessionNotFoundException:
This Exception occurs when the driver is performing the action after immediately quitting the browser.
Example:-
driver.quit();
driver.findElement(By.id("username")).sendKeys("Mukesh");

8. StaleElementReferenceException:
This Exception occurs when the Element belongs to a different frame than the current one. The user has navigated away to another page.
Example:-
WebElement element=driver.findElement(By.id("username"));// Element is available in parent window
driver.switchTo().window(Child_Window);//Switch to Child Window
element.sendKeys("Mukesh");//perform the action on the element which is not visible in the child window

9. InvalidElementStateException:
when element is in disabled mode, we can encounter this exception
WebDriver driver=new ChromeDriver();

driver.get("http://www.testing.com");

// This element is disable, so if we try to click on disable webelement then it will throw exception
// Using below code it will pass the data forcefully.

JavascriptExecutor jse = (JavascriptExecutor) driver;

jse.executeScript("document.getElementById('pass').value = 'Testing';");

10. ElementNotClickable:

// Scroll the browser to the element's Y position
((JavascriptExecutor)driver).executeScript("window.scrollTo(0,"+elementToClick.getLocation().y+")");

11. illegalstateexception:
  java.lang.illegalstateexception
 When we don't use system.setpropery method for Chrome, IE, Mozilla this exception comes
System.setProperty("webdriver.ie.driver","path of the chromedriver.exe");
WebDriver driver=new InternetExplorerDriver();

12. stateelementexception:
How to solve Stale Element Reference exception

Solution 1:
You can refresh the page and again try for the same element.
Example- If you are trying to click on link and getting the exception then try in below format
Driver.navigate().refersh();
Driver.findElement(By.id(“ur element id”)).click();

Solution 2:

Sometimes it takes the time to attach element on Dom so you can retry using for loop and try catch.
for(int i=0i<=2;i++)
{
  try{
     Driver.findElement(By.id()).click();
    break;
}
catch(Exception e)
{
Sysout(e.getMessage());
}
}

Selenium - Different types of locators


Selenium identifies elements with locators. There are total 8 different types of locators available and those are mentioned in below with examples.

1. xpath
2. cssSelector
3. name
4. id
5. className
6. linkText
7. partialLinkText
8. tagName

There are different ways of finding xpath:

Using single attribute:
sintax: // tagname[@attribute-name=’value1’]

Example:
//a[@href=’http://www.google.com’]
//input[@id=’name’]
//input[@name=’username’]
//img[@alt=’sometext’]

Using multiple attributes:
Syntax: //tagname[@attribute1=’value1’][attribute2=’value2’]

Example:
//a[@id=’id1’][@name=’namevalue1’]
//img[@src=’’][@href=’’]
//a[@href='/log-in/link' and contains(text(),'Email me a login link')]
//a[contains(text(),'Get Started') and @id='hero-cta']
//bdi[contains(text(),'Description')]

Using Contains method:
Syntax with examples:
//tagname[contains(@attribute,’value1’)]
//input[contains(@id,’’)]
//input[contains(@name,’’)]
//a[contains(@href,’’)]
//img[contains(@src,’’)]
//div[contains(@id,’’)]
//a[@href='/log-in/link' and contains(text(),'Email me a login link')]
//a[contains(text(),'Get Started') and @id='hero-cta']
//bdi[contains(text(),'Company')]

Using Starts method:
//tagname[starts-with(@attribute-name,’’)]
//id[starts-with(@id,’’)]
//a[starts-with(@href=’’)]
//img[starts-with(@src=’’)]
//div[starts-with(@id=’’)]
//input[starts-with(@id=’’)]
//button[starts-with(@id,’’)]

Using Following node:
Xpath/following::again-ur-regular-path
//input[@id=’’]/following::input[1]
//a[@href=’’]/following::a[1]
//img[@src=’’]/following::img[1]
''from gmail login page example
//input[@name='identifier']/following::button[contains(text(),'Forgot email')]
//div[@class='card-body']/p[contains(text(),'First way to initialize all tooltips')]/following-sibling::div[@class='docs-clipboard']
//bdi[contains(text(),'Company')]/following::input[1]
//bdi[contains(text(),'Description')]/following::textarea
Using Preceding node (next node)
Xpath/preceding::again-ur-regular-path
//input[@id=’’]/ preceding::input[1]
//a[@href=’’]/ preceding::a[1]
//img[@src=’’]/ preceding::img[1]

Absolute XPath method:
If we give whole path to identify element and it is called as absolute xpath.
Example: /html/head/body/div/input

Text method in XPath:
Syntax- tagname[text()=’text which is visible on page’]
Note- While using text() method make sure you provide the exact text else it will not match
Example //b[text()=’Admin’]

Text method with contains:
Syntax- tagname[contains(text(),’partial text which you want to search ‘)]
Example – //*[contains(text(),’Employee Distribution by Subunit’)]

Relative and Absolute XPath method
//parent-xpath/absolute xpath
//input[@id=’section’]/div/input

Xpath Axes
Following
Proceeding
ancestor

// means searches through the page
/ means searches only after the following element

various methods available in xpath
using And & Or
Contains()
Start-with()
Text()
Following::
Preceding::
Ancestor
Absolute Vs Relative Path

cssSelector:
in terms of performance, CSS perform well as compared to XPATH and CSS will not change based on browsers, that is it will behave same in all browsers but xpath will behave differently in IE browser.

symbol used while writing css selector in selenium
attribute symbol used
id #
className .
attribute tagname[attribute='value']
multiple attribute tagname[attribute1='value1'][attribute2='value2']
contains *
starts with ^
Ends with $

CSS Selector is the combination of an element selector and a selector value which identifies the web element within a web page. The composite of element selector and selector value is known as Selector Pattern.

CSS Selector: ID
Example:
css=input#Email

CSS Selector: Class
css=label.remember

CSS Selector: Attribute
css=input[type=’submit’]
css=input#Passwd[name='Passwd']

tagName[attributename=attributeValue]
Example 1: input[id=email]
Example 2: input[name=email][type=text]

WebElement ele1 = driver.findElement(By.cssSelector(".primary-btn"));
WebElement ele2 = driver.findElement(By.cssSelector(".btn.primary-btn"));
WebElement ele3 = driver.findElement(By.cssSelector(".submit.primary-btn"));

WebElement Email = driver.findElement(By.cssSelector("input[id=email]"));
Email.SendKeys("hello@sampleemail.com");